• WANTED: Happy members who like to discuss audio and other topics related to our interest. Desire to learn and share knowledge of science required. There are many reviews of audio hardware and expert members to help answer your questions. Click here to have your audio equipment measured for free!

Topping PA5 fix - D01 Module Replacement for everyone

Lräk

Member
Joined
Jul 7, 2022
Messages
73
Likes
87
Location
Santa Clara, CA
when my next protoypes arrive, i got two boards i could sell but due to opamp cost and time i require to get them assembled, expect 40 euros for one, plus shipping.
I'm trying to figure out how to order a pre-assembled board(s) here in the U.S. I probably have the skill to put together the DIP version, but I don't want to spend a bunch of time ordering all the parts. So is a completed board an option?

I've worked in the electronics world for 40 years till my retirement, but always had others put together the completed boards for me. I just did the design and debug. My early years I could solder DIP and through hole parts. Surface mount was just not for me.

I actually have 2 working PA5's because my first crapped out and after I opened it up and tried to debug it, it came back to life, but AFTER I ordered another PA5. I'm willing to un-solder the module and try the DIP version because I want to play around with changing the op-amps like I did with an Aiyima A07 just for fun.

Maybe I can order several boards if the cost per board comes down and ship some to those in the U.S. who want to try it too. I just haven't figured out how to order it.
 
OP
gamerpaddy

gamerpaddy

Member
Joined
Mar 6, 2022
Messages
71
Likes
320
Location
Germany
Hey Lräk,

its not too hard. heres guide on how to order pcb's where i order them usually:

if you want to source and solder 0603 smd components yourself, you only need to read step 1 to 4, 9 and 11 and 12.


1. Go to https://oshwlab.com/gamerpaddy/topping-d01-replacement

2. Click on Editor Open (top right)

3. Once project has opened, Click on Project in the most left Panel (top)

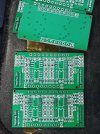
4. select the PCB version you want from the left panel (Green symbols)

5. Click on the first [ B ] symbol on the top bar
firefox_cNP5cZ9ptL.png

6. Click assign part number on each part and go to the "JLCPCB Assembly" tab. Then look for the part you need.

for example if the list states 4.7n in name, c0603 in footprint, its a 4.7nF SMD capacitor, look for "4.7nF Basic C0603" and select the part that fits (their search is horrible)
you can ignore the Headers BACK1 and FRONT1 you need to solder them yourself unless you do both-sided assembly which is expensive.
some designs like the dip8 allready have parts assigned, it may not be necessary to assign a part to all entries. proceed until step 17 and if something is not available, correct it and repeat. or just assign all parts right away.

(select as many basic parts as you can, extended parts will cost extra)

i advise you to source your own opamps locally, the chinese provider may have original parts but they are usually not in stock. LCSC (where jlcpcb sources its parts) usually has genuine parts unlike most sellers on aliexpress..

be sure that footprint and the value are correct, their search is horrible and shows everything else aswell.. it takes some time.
sometimes you wont find special parts like 4.9nF capacitors. just use the closest, like 4.7nF.
firefox_RAzOeNtsIO2.png
Some parts might be out of stock, also check the bottom for SMT Service Stock. 207 here.
firefox_rBjd7TD9ja.png


7. after all entries have a part number assigned click on "Export BOM" on the bottom and keep the selection as is.

8. Now go back to the 3 Icons in the top bar, click on [ G ] to export the design files.
Click on check DRC, it shouldnt fail since you didnt change anything on the design.

9. Click on "Generate Gerber"

10. Click on the last icon in the top bar [(+)] to generate the Pick and Place file.
leave settings as is and hit export.

11. Go to http://jlcpcb.com and register an account(!), be sure you logged in then click on Instant Quote

12. Click on Add Gerber file and select the Gerber zip file you exported

13. go to the bottom and enable PCB assembly
play with the settings, want different color, gold plating? cheapest would be default with green pcb's.
you will see the rough price (not including components and shipping yet) on the right side.

14. after you selected everything, in the PCB Assembly pane, be sure to select the side where parts will be. the DIP version and the single sided both have only Top side parts.
also select the quantity you want to be assembled (you still get 5 pcbs but only 2 are populated when selecting two and 5 on the top pane)
leave rest as is.

15. Click on confirm and then Next

16. Select the BOM file and Pick & Place file, hit Process.

17. make sure all needed parts are correct, in stock and what not. if you see something like this:

firefox_nxAB1GvThP.png
or any other red message, replace the part using "Search" or just ignore it and fit it yourself when receiving the pcb's
sometimes just ignore it if its not related to a part you want to fit.
firefox_RfK6jQa7e9.png


18. Hit Next, ignore that view its sometimes wrong, just hit Next again.
You will see your final price right here for finished boards. Select a category (maybe for customs? i dont know)
and Hit Save to Cart

19. in the Cart, do your checkout. select which shipping you want, address, payment method.

done,
it takes, depending on how much you want to spend on shipping between 1 and 3 weeks for them to arrive.

you obviously can go mayhem on the parts and quality you wanna use.
but most of them are not in the assembly service so you gotta fit it on your own like C0G NP0 Capacitors, low drift precision resistors and such.
 
Last edited:

Moto

Active Member
Joined
Jan 19, 2021
Messages
180
Likes
41
Thank you so much for that! As a noob to pcb design, that is exactly what I needed. I am trying to find a high input impedance, very low output impedance unity gain buffer circuit design and pcb layout to order. I’m using it for measurement purposes and it has to be very low thd+n. The circuit I have is with an opa1612, is very simple and works to about -117 db thd+n but it needs a good pcb to get hopefully -123db.
I just realized I’m off topic, but thx again for your tutorial.
 

BrianTran132

New Member
Joined
May 15, 2023
Messages
4
Likes
8
Thanks for the awesome work gamerpaddy!

My PA5 just stopped working today (14 months old), which I assume is due to this issue. Definitely appreciate your work into fixing this issue!
 

Lräk

Member
Joined
Jul 7, 2022
Messages
73
Likes
87
Location
Santa Clara, CA
Thanks for the awesome work gamerpaddy!

My PA5 just stopped working today (14 months old), which I assume is due to this issue. Definitely appreciate your work into fixing this issue!
Not necessarily. My first PA5 stopped working. Different failure mode than others. It just stopped. Although I did contact the seller, it was going to be such a PIA sending it to China, that I tried to debug it myself and opened it up. Without a schematic, I was able to figure out much of how it worked by measuring every node I could. I even ordered a 2nd PA5 from a different seller.

I couldn't find any obvious problems and put it back together. Darned thing worked!!! So now I have 2 PA5's!!

Last month I was swapping cables around and got a spark from the right inputs...then the right output wasn't working. Opened it up and again couldn't find anything wrong. When I put it together again, it was working!!!

Anyway, what exactly do you mean by 'stopped working'? Completely or noise coming out of the left speaker?
 

BrianTran132

New Member
Joined
May 15, 2023
Messages
4
Likes
8
Not necessarily. My first PA5 stopped working. Different failure mode than others. It just stopped. Although I did contact the seller, it was going to be such a PIA sending it to China, that I tried to debug it myself and opened it up. Without a schematic, I was able to figure out much of how it worked by measuring every node I could. I even ordered a 2nd PA5 from a different seller.

I couldn't find any obvious problems and put it back together. Darned thing worked!!! So now I have 2 PA5's!!

Last month I was swapping cables around and got a spark from the right inputs...then the right output wasn't working. Opened it up and again couldn't find anything wrong. When I put it together again, it was working!!!

Anyway, what exactly do you mean by 'stopped working'? Completely or noise coming out of the left speaker?

Just no sound from the left speaker output. Swapping the cables for left and right speakers confirmed the issue is with left output of the PA5.

I also tried output 2 and multiple power cycles (from the back), but there was no difference.

Quite glad I did not have any of the intermittent popping issues other users had.
 

aphysically

Member
Joined
May 1, 2022
Messages
67
Likes
54
Was the crackling caused by this issue dangerous for the speakers? Wondering if mine could be damaged by a crackling/popping I had when LA90D failed.

Also - is there any visual indication that the module is what failed if you open it up. I'm wondering if I would be able to visually identify if that's also what failed on my LA90D.
 
Last edited:

antcollinet

Master Contributor
Forum Donor
Joined
Sep 4, 2021
Messages
7,903
Likes
13,386
Location
UK/Cheshire
Was the crackling caused by this issue dangerous for the speakers? Wondering if mine could be damaged by a crackling/popping I had when LA90D failed.

Also - is there any visual indication that the module is what failed if you open it up. I'm wondering if I would be able to visually identify if that's also what failed on my LA90D.
very unlikely your LA90D will have the same fault - or even the same module.
 
OP
gamerpaddy

gamerpaddy

Member
Joined
Mar 6, 2022
Messages
71
Likes
320
Location
Germany
different module, maybe same failure cause. they are still potted arent they? why did no one take one apart yet ^^
 

Lräk

Member
Joined
Jul 7, 2022
Messages
73
Likes
87
Location
Santa Clara, CA
Thanks for the awesome work gamerpaddy!

My PA5 just stopped working today (14 months old), which I assume is due to this issue. Definitely appreciate your work into fixing this issue!
BTW the PA5 warranty was extended to 2 years after this fiasco so you still could get a new/repaired PA5 if you want.
 

Gphoton

Member
Joined
May 7, 2020
Messages
44
Likes
31
Thank you for both the PCB design and the tutorial on how to order. Great learning experience. Ordered single side DIP version.
 

BrianTran132

New Member
Joined
May 15, 2023
Messages
4
Likes
8
BTW the PA5 warranty was extended to 2 years after this fiasco so you still could get a new/repaired PA5 if you want.
Thanks!

Found the forum posts and referenced it in my email to topping. Not too enthusiastic if I have to pay $100+ to ship it to a China for repair though.

Mostly because I doubt the fix would be anything other than a new potted module waiting to die.
 

b7676

Active Member
Joined
Aug 27, 2021
Messages
146
Likes
88
So right channel preference for single channel PA5 use?
 
Top Bottom